NDI Tutorial
Introduction:
The new version of YYCam Pro has updated the NDI function module. In order to facilitate users to easily get started with this new function, this tutorial is linked to OBS. Users can easily experience the powerful functions of NDI in OBS by following this tutorial.
Step 1: Configure NDI in the OBS application
Install the OBS software [Remember the program installation location when installing]: https://obsproject.com/download
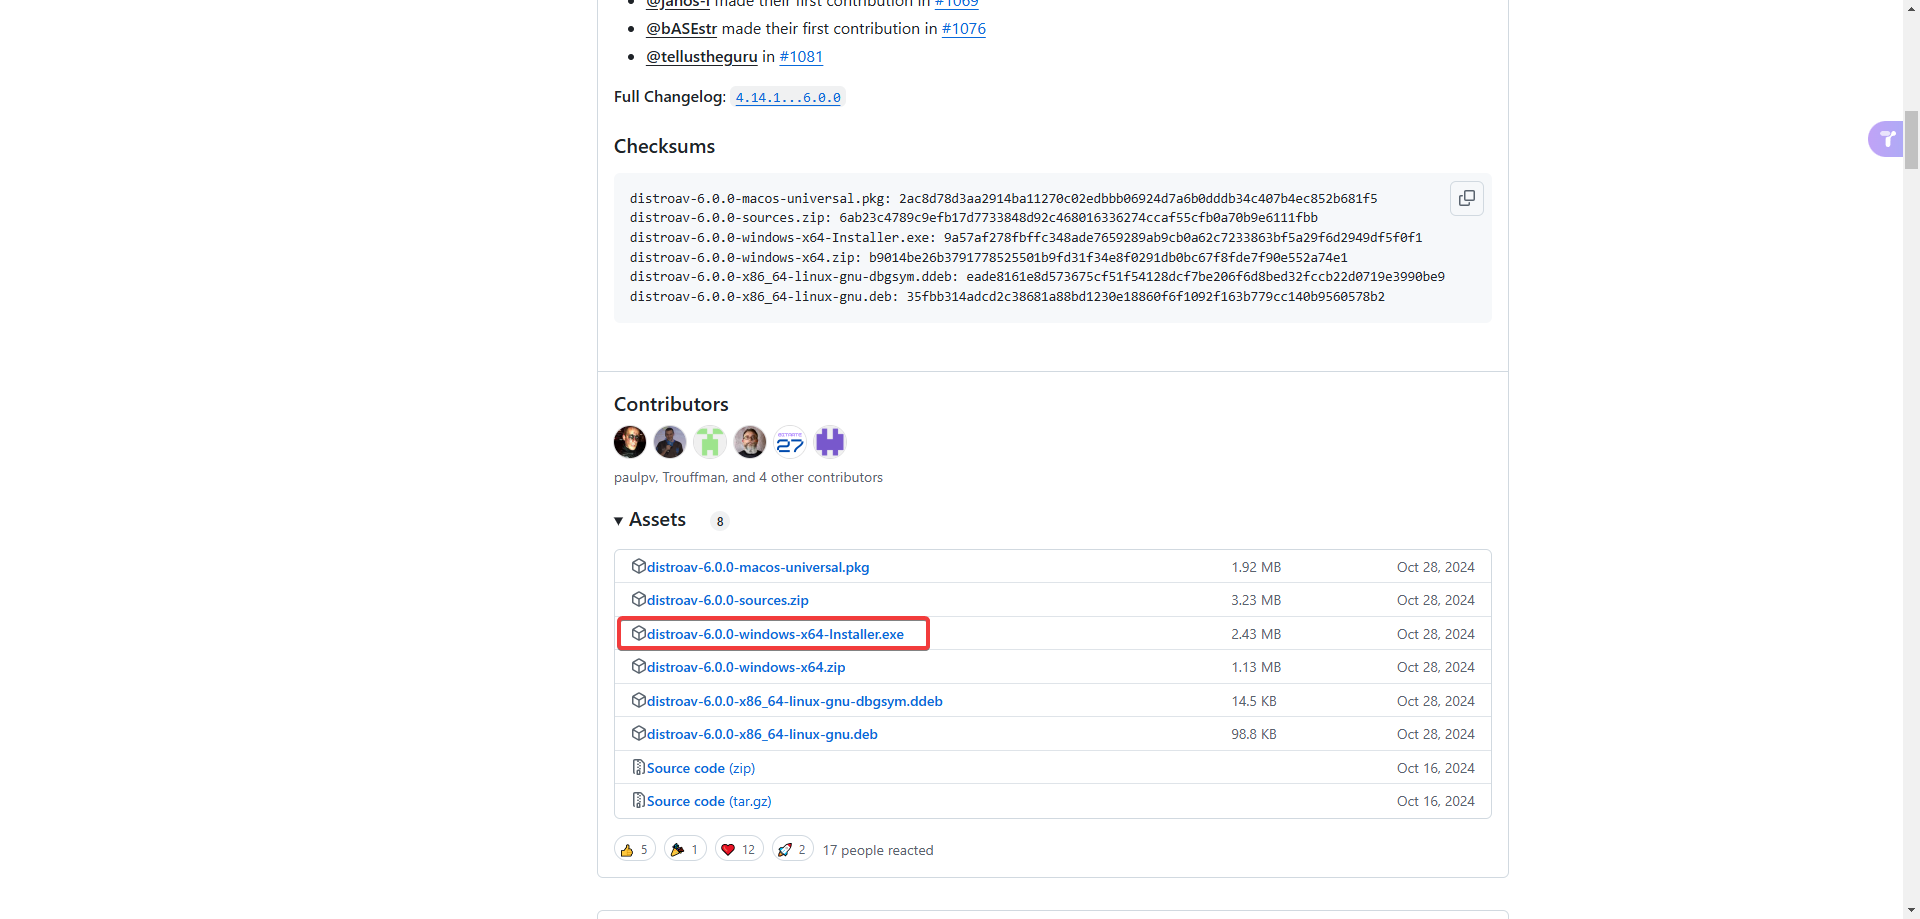
Install the NDI plug-in of OBS [Install the latest one]: https://github.com/DistroAV/DistroAV/releases
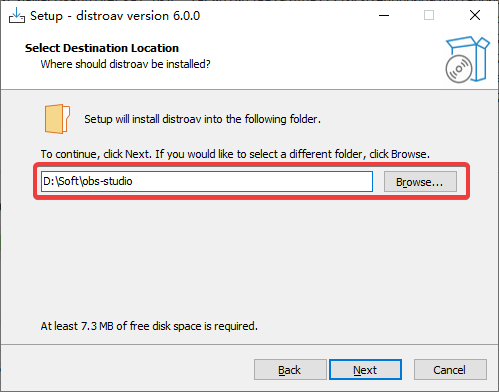
The installation path of the plug-in should be the installation location of the OBS program.
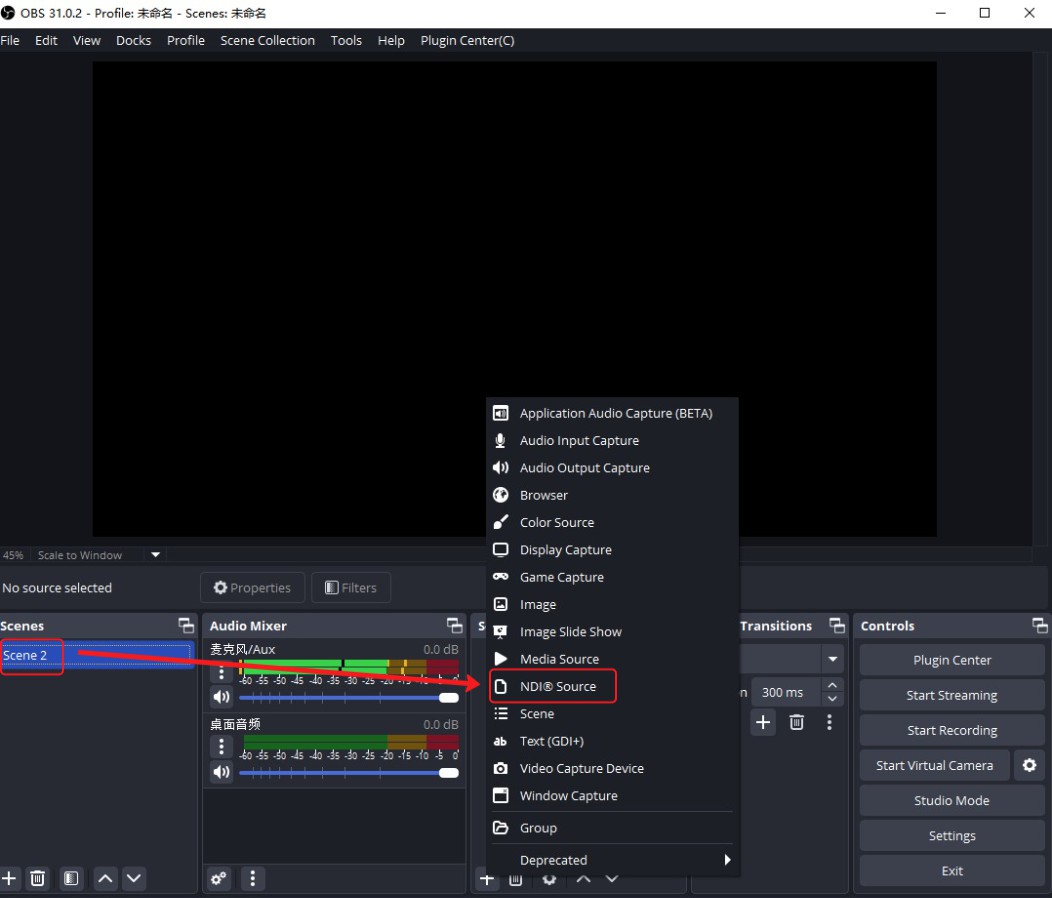
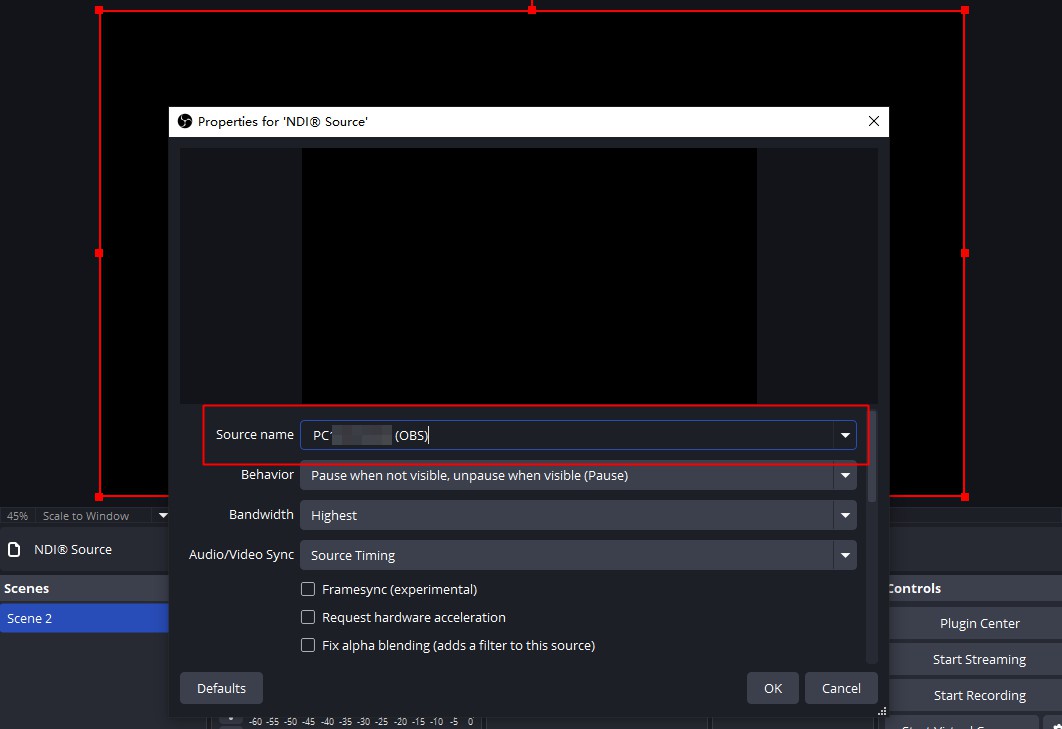
After the installation is complete, you can add the NDI source in the scene.
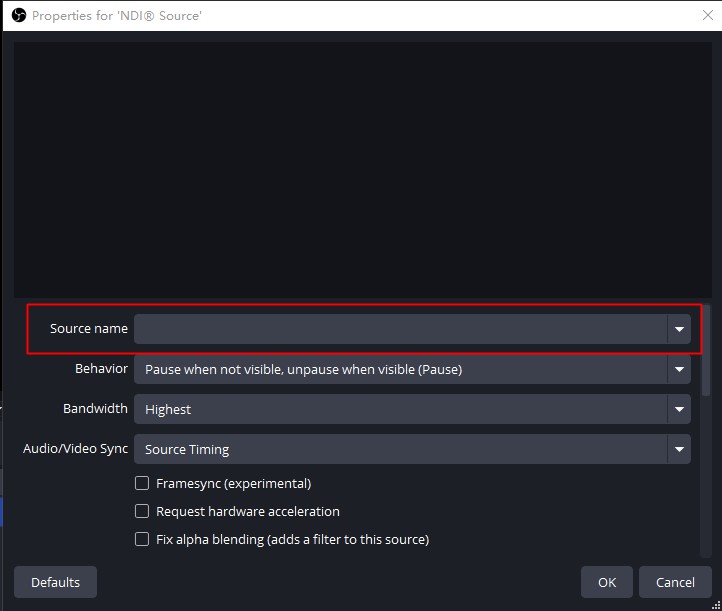
In the setting window [Source Name], select the NDI stream sent by the YYCamPro
Step 2: Link the NDI module in YYCam Pro
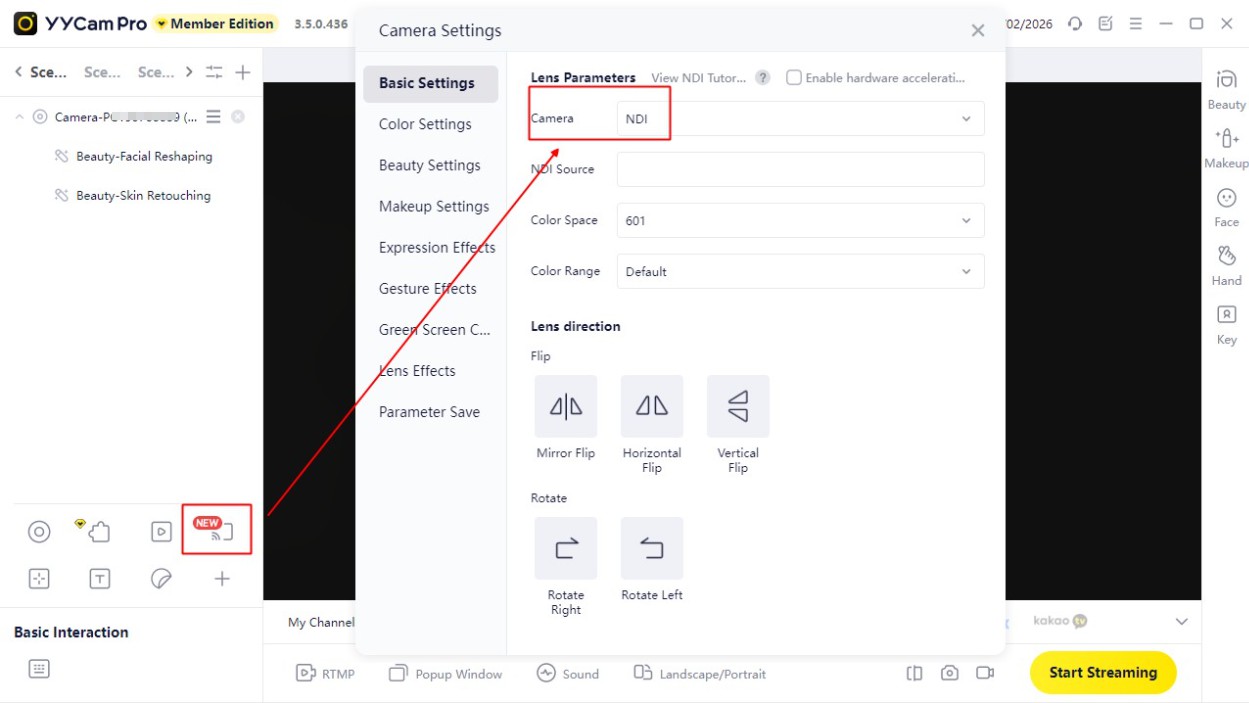
Open the YYCam Pro
Select the NDI function in the function area on the lower left
Click and the [Camera Settings] page will appear. Confirm that the camera is [NDI]
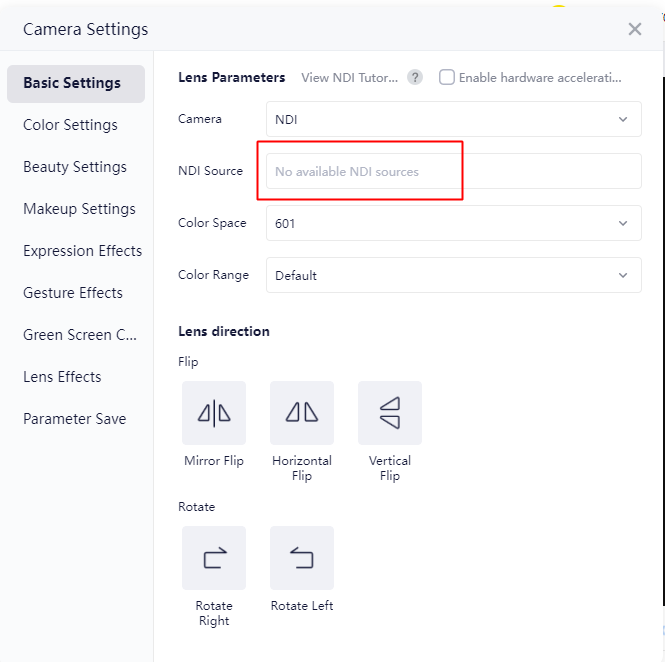
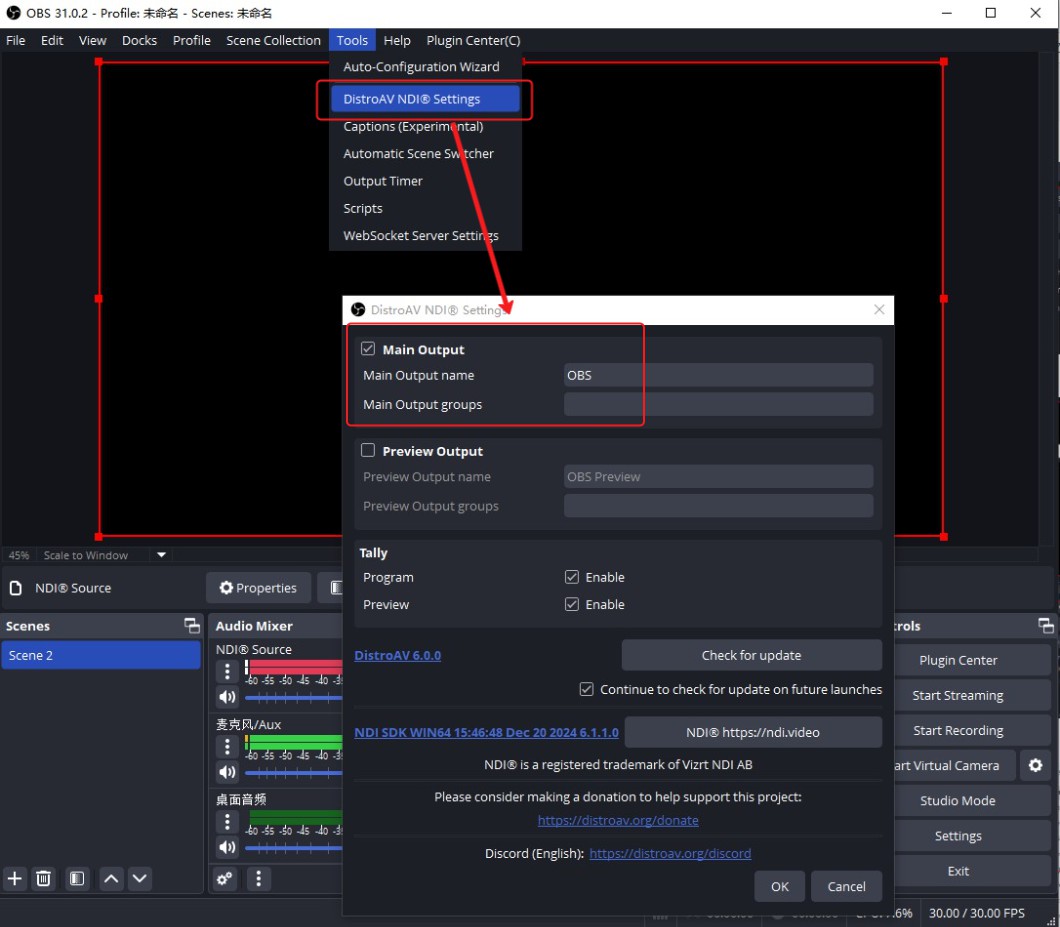
- If [NDI Source] shows [No available NDI sources], you need to set [NDI] as the [Main Output] source in OBS first.
Conclusion:
The new version of YYCam Pro's NDI linkage function brings you a more professional and convenient live broadcast experience, which can be easily achieved through the above steps.